
design a circuit board
Assembling a circuit board, whether for a hobby project or a professional application, requires a variety of specialized tools to ensure precision and reliability in the finished product. The process of attaching electronic components to a printed circuit board (PCB) involves soldering, testing, and troubleshooting, and each step necessitates the use of specific tools. Below are the essential tools needed for assembling a circuit board.
A soldering iron is one of the most fundamental tools in PCB assembly. This handheld device is used to heat the solder, a metal alloy that melts and bonds components to the board. The soldering iron typically has a pointed, heated tip that is placed against the solder and the connection point on the circuit board to create a strong, conductive joint. For delicate work, temperature-controlled soldering irons are ideal, as they allow precise heat regulation to prevent damage to sensitive components. Depending on the project, soldering irons with different tip sizes may be used to handle a range of components, from small surface-mount devices (SMDs) to larger through-hole components.
Solder wire is the filler material that melts to form the electrical connection between the components and the PCB. It typically comes in different thicknesses and compositions. Lead-based solder, a traditional option made from a mix of lead and tin, is easier to work with because of its lower melting point. However, due to environmental concerns, lead-free solder is now more commonly used, made primarily of tin with small amounts of other metals like copper or silver. The solder wire often contains flux, a chemical agent that helps clean the metal surfaces and improves the quality of the solder joint.
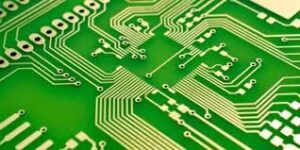
How do you design a circuit board?
A soldering station includes not only the soldering iron but also a base unit with temperature controls and sometimes additional features like a sponge holder or a soldering tip cleaner. A high-quality soldering station allows the user to set the temperature based on the solder material being used and the type of components being soldered. For assembling complex boards, having precise control over heat is essential to avoid damaging delicate components or creating poor-quality solder joints.
Mistakes are inevitable when assembling a circuit board, which is where solder wick and a desoldering pump come in handy. Solder wick is a fine copper braid used to absorb excess solder from a joint. When heated, the wick draws the solder away from the connection, allowing you to remove faulty solder and redo the joint. A desoldering pump, also known as a solder sucker, is a vacuum tool that removes molten solder by sucking it away when a button is pressed. Both tools are invaluable for correcting mistakes during the assembly process.
Working with small components such as surface-mount devices (SMDs) requires precision, and tweezers are essential for handling these tiny parts. ESD-safe tweezers, which prevent the buildup of static electricity, are particularly useful when working with sensitive components that can be damaged by electrostatic discharge. Fine-point tweezers are often used to place small parts onto the board accurately before soldering.
A multimeter is a versatile electronic testing tool that measures voltage, current, and resistance in a circuit. After soldering components onto the PCB, it’s important to test the electrical connections to ensure everything is working correctly. A multimeter can be used to check for continuity (ensuring there are no breaks in the circuit), test component values, and verify that power is reaching the appropriate points on the board.